


© 2024 EasyEDA Some rights reserved ISO/IEC
Editor Version
×
Standard

1.Easy to use and quick to get started
2.The process supports design scales of 300 devices or 1000 pads
3.Supports simple circuit simulation
4.For students, teachers, creators
Profession

1.Brand new interactions and interfaces
2.Smooth support for design sizes of over 5,000 devices or 10,000 pads
3.More rigorous design constraints, more standardized processes
4.For enterprises, more professional users
Ongoing
STD C64 64k/256k Cartridge DIP
License: CC-BY-SA 3.0
Mode: Editors' pick
- 9
Update time:
2022-01-22 12:54:50
Creation time:
2019-11-17 14:46:30
Description
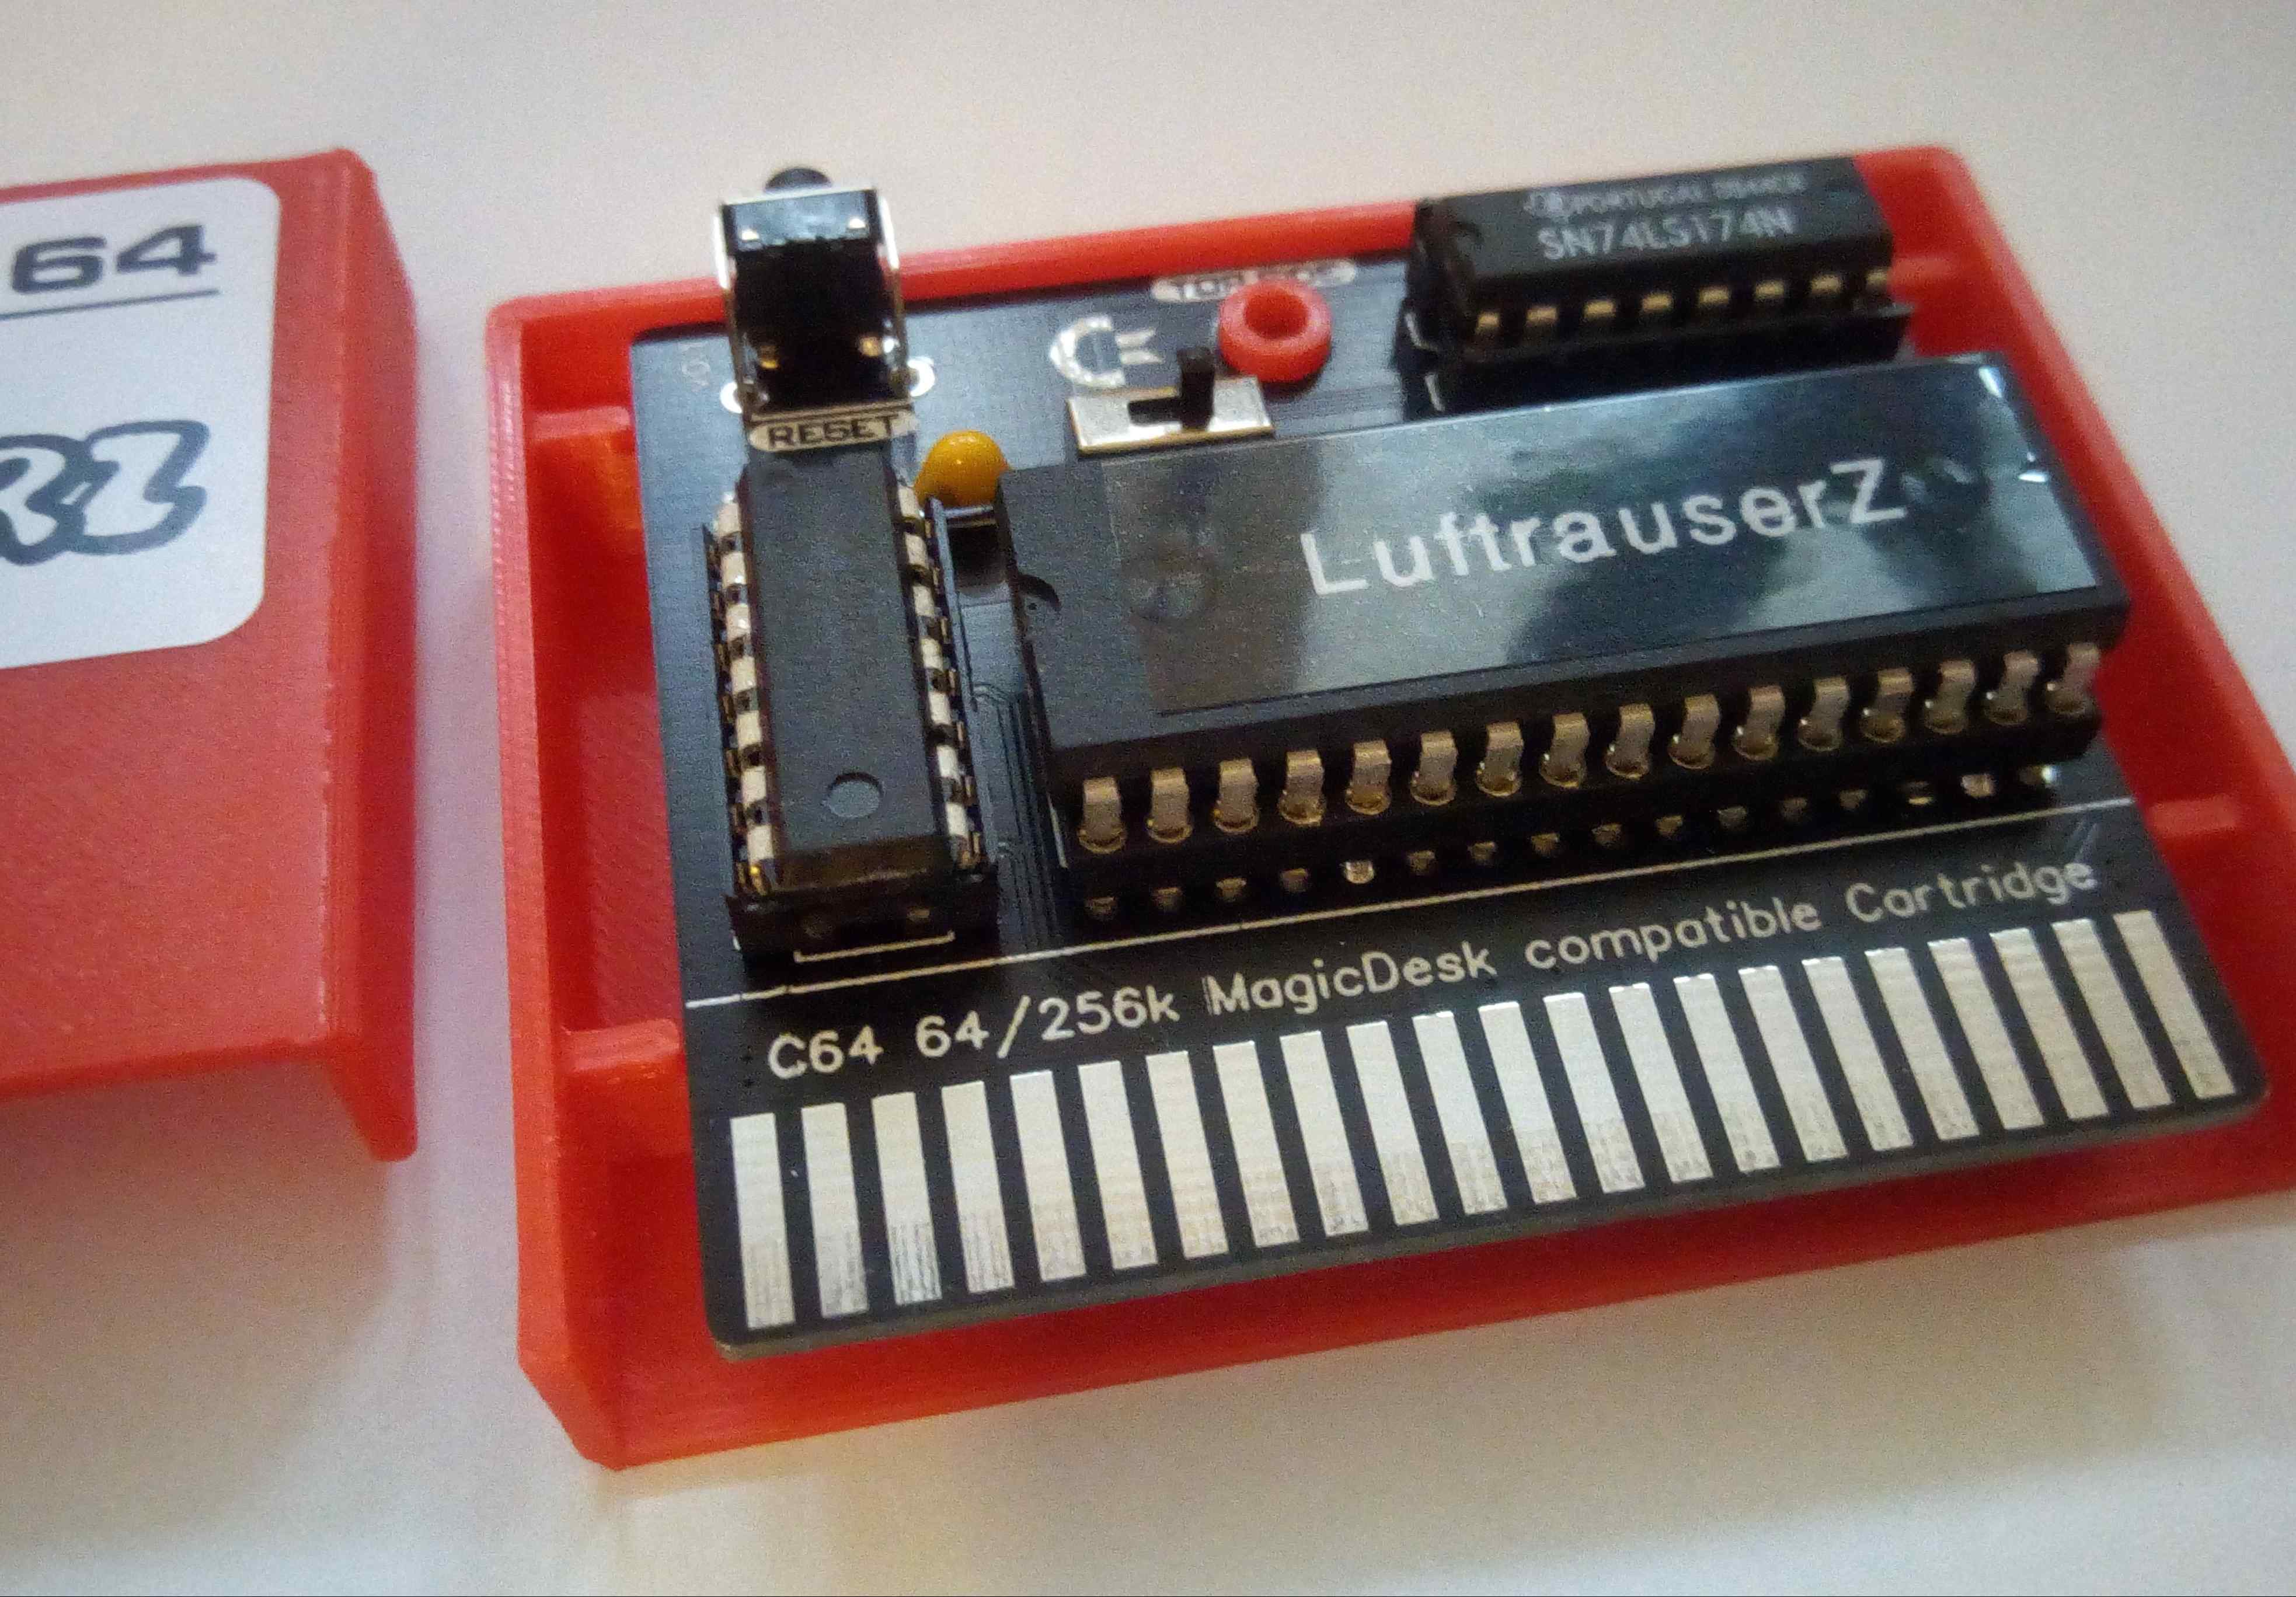
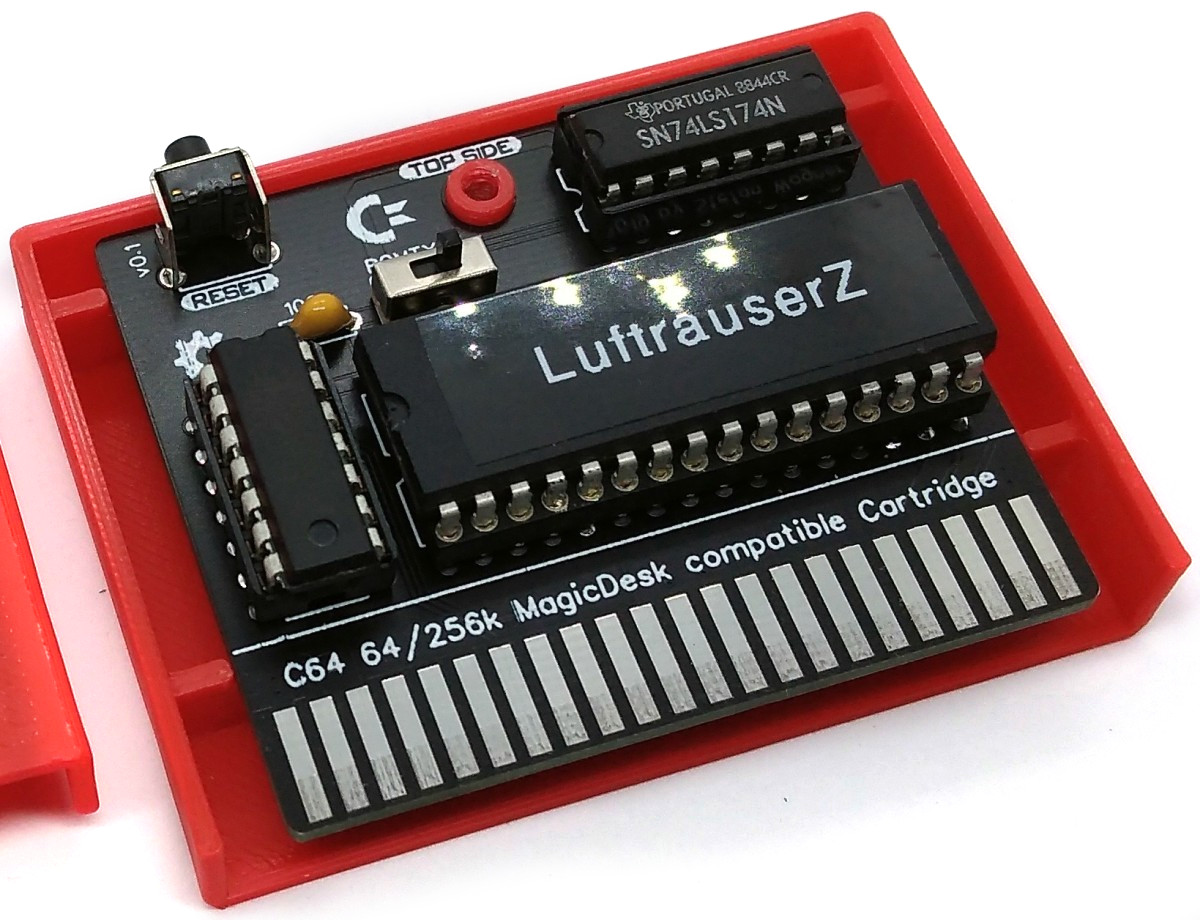
# C64 64k/256k Cartridge
MagicDesk compatible cartridge for Commodore C64 based on the work of [Marko Šolajić](https://github.com/msolajic/c64-magic-desk-512k) and [Zzarko](https://bitbucket.org/zzarko/magic-desk-cartridge-generator/src/master/). Build your own cartridges out of multiple PRG-files!
- Project Files (Github): https://github.com/wagiminator/C64-Collection
# Usable Types of (E)EPROMs
Most 64k and 256k (E)EPROMs should work. They usually have one of the following identifiers in their names: 27512, 28512, 27C512, 28C512, 27C020, or 28C020.
# Creating your own Cartridge from PRG Files
You can create a games/software collection with a selection menu on a single cartridge using the [MagicDesk Cartridge Generator](https://bitbucket.org/zzarko/magic-desk-cartridge-generator/src/master/) software by Zzarko. You can also create a cartridge with just one game/program without a menu using the [Single PRG Cartridge Generator](https://github.com/Feandreu/mdeskcrtgenfsp) software by Feandreu. How it works is explained on the respective website. A BIN file containing the image for the cartridge is created in each case.
# Burning a BIN File to the (E)EPROM
There are numerous programming devices/EPROMers. The [MiniPRO TL866](https://aliexpress.com/wholesale?SearchText=MiniPro+TL866) is used in these instructions. This is available for around €50 and supports almost all (E)EPROMs.
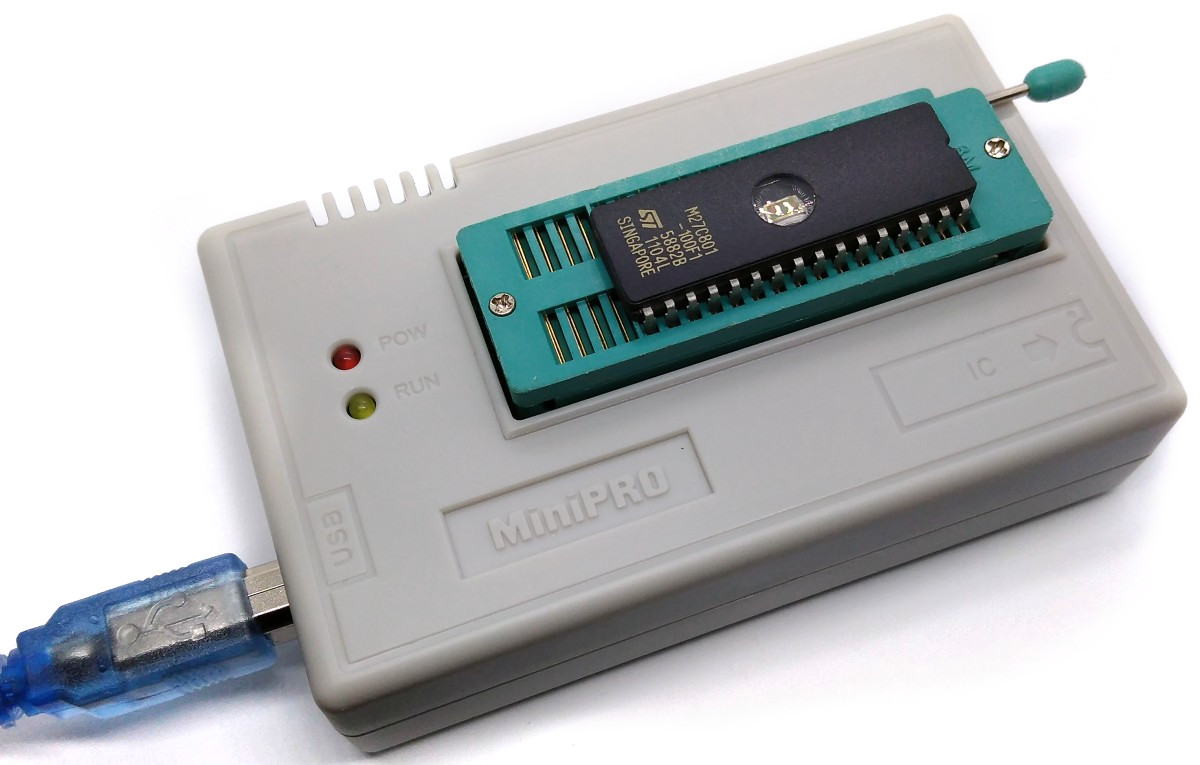
After starting the MiniPRO software, search in the IC database for the (E)EPROM used. The (E)EPROM must now be correctly inserted in the socket. A click on the "Information" button shows how this must be positioned. Pay attention to the notch and to pin 1. If an EPROM (not EEPROM) is used, the following must be observed: Make sure that the EPROM is empty. A "blank check" provides information about this. An EPROM that is not empty must first be erased. EEPROMs, on the other hand, can simply be overwritten. Open the cartridge image and confirm with "OK". Now click on the "P" button and confirm with "Program". The (E)EPROM will now be burned. So that the EPROM does not lose its data, the glass pane should be sealed with an opaque adhesive tape. An EEPROM does not have this window and there is also no risk of the data being lost.
The (E)EPROM is now ready for use and can be plugged into the socket of the cartridge. Important: Pay attention to the alignment of the notch on the (E)EPROM! It must match the notch on the module PCB.
The MiniPRO software is only available for Windows, but it also runs smoothly on Linux and Mac with WINE. Alternatively, the open source command line tool [minipro](https://gitlab.com/DavidGriffith/minipro/) is available for these operating systems.
# Erasing an EPROM
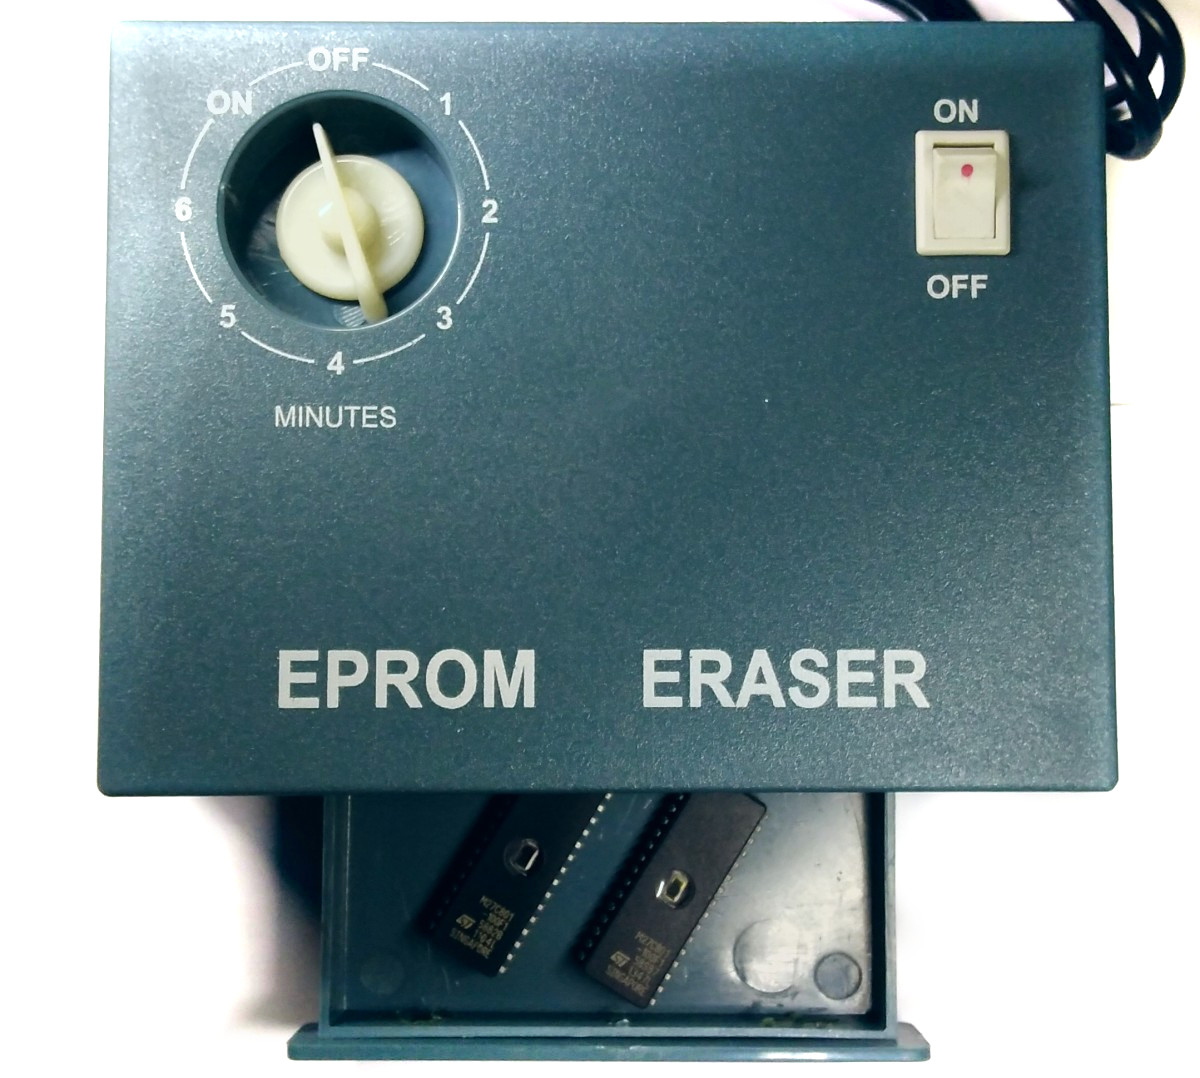
In contrast to EEPROMS (Electrically Erasable Programmable Read-only Memory), EPROMs cannot be overwritten with new data, but must first be erased with an EPROM eraser. This sends ultraviolet radiation into the EPROM. This erases the memory, which can then be rewritten. A cheap [EPROM eraser](https://aliexpress.com/wholesale?SearchText=eprom+eraser) is sufficient. Don't forget to remove any UV cover from the EPROM. The erasing process takes 10-15 minutes in most cases. The EPROM can then be written to again.
# Operating Instruction
- Switch off your C64 if you haven't already done so.
- Insert the cartridge into the expansion slot of your C64.
- Switch on your C64.
- The program on the cartridge starts automatically.
# References, Links and Notes
1. [Original Hardware by Marko Šolajić](https://github.com/msolajic/c64-magic-desk-512k)
2. [Original Software by Zzarko](https://bitbucket.org/zzarko/magic-desk-cartridge-generator/src/master/)
3. [Single PRG Modification by Feandreu](https://github.com/Feandreu/mdeskcrtgenfsp)
4. [minipro Software](https://gitlab.com/DavidGriffith/minipro/)
5. [C64 Games](https://www.c64games.de/)
Design Drawing
schematic diagram
(
1
/
)
PCB
(
1
/
)
The preview image was not generated, please save it again in the
editor.
BOM
Project Members


 4
4
 9
9
Collect to album
Target complaint
Related Projects
Change a batch
Loading...
Add to album
×
Loading...
reminder
×
Do you need to add this project to the album?